~14 min
PoE 2 Return of the Ancients Best League Starter Builds Guide
What This Guide Is About
This guide is a complete tier list of the best league starter builds for Path of Exile 2: Return of the Ancients in patch 0.5.0. It is designed to help players choose a strong, reliable, and efficient build for the beginning of a new league.
Why This Guide Is Useful
Choosing the right league starter is one of the most important decisions in Path of Exile 2. A good starter build allows players to level faster, clear content more comfortably, farm currency earlier, and transition into endgame activities with fewer problems.

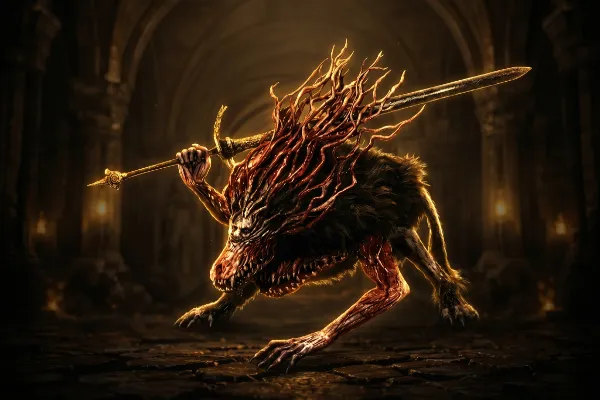
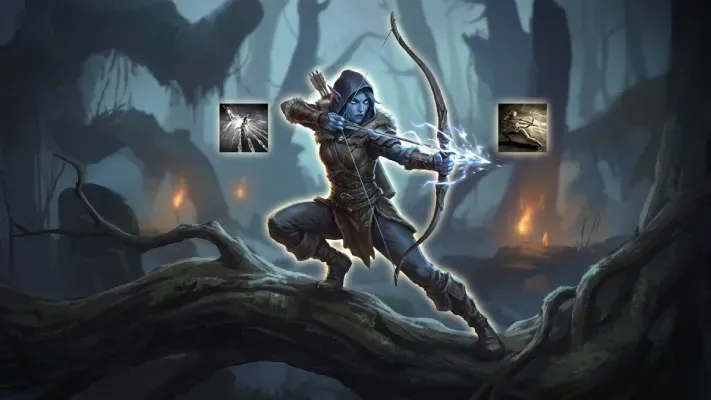
Twister Huntress Levelling Build

Build Overview
This build is designed specifically for fast and efficient campaign progression and comfortable league start.
Twister Huntress is currently considered one of the strongest leveling setups for the Huntress class, offering exceptional clear speed and impressive boss damage throughout the campaign.
The build has already proven its efficiency with campaign completion times as fast as 3 hours and 25 minutes.
Strengths
- Excellent pack clear with powerful shatter explosions;
- Strong single-target damage against bosses and rares;
- Very fast campaign progression and leveling speed;
- Smooth gameplay with high mobility and screen coverage.
Weaknesses
- Fragile defenses;
- Requires careful positioning during dangerous encounters;
- Mistakes can be heavily punished in higher difficulty content.
Equipment Priorities
Use the following search regex to quickly filter useful leveling upgrades:
- Weapon Set 1 – use the fastest Spear you can find for Whirling Slash. A high attack speed base like a Winged Spear is ideal.
- Weapon Set 2 – prioritize % increased Physical Damage and flat damage first, then look for +Projectile Skills.
- Boots – Movement Speed is the main priority, followed by Resistances, Life, and Evasion.
- Rings – look for flat damage first, then add Resistances and Life where possible.
- Gloves – flat damage is the best offensive stat, with Resistances, Life, and Evasion as useful extras.
- Helmet / Body Armour – focus on Resistances, Life, and Evasion to patch up defenses.
- Amulet – +Projectile Skills is the strongest option, followed by Life and Resistances.
- Belt – a Rawhide Belt with solid Resistances and Life is the best early choice.
Skill Gems
Below you’ll find the recommended Skill Gem setup for the Twister Huntress Levelling Build, including core damage skills, support gems, and useful utility options for campaign progression.
Twister
Use the following support priority for Twister while leveling:
- Retreat
- Frost Nexus
- Elemental Armament I / II
- Projectile Acceleration I / II / III
Whirling Slash
Recommended support setup for Whirling Slash during leveling:
- Rage III
- Rapid Attacks III
- Knockback
Herald of Ice
Recommended support setup for Herald of Ice while leveling:
- Magnified Area II
- Elemental Armament
- Cold Attunement II
Freezing Mark
Recommended support setup for Freezing Mark during leveling:
- Prolonged Duration II
- Charged Mark
War Banner
Recommended support setup for War Banner while leveling:
- Prolonged Duration II
Ise – Tripped Arrows
Recommended support setup for Ise – Tripped Arrows during leveling:
- Elemental Armament
- Elemental Focus
- Cooldown Recovery II
Barrage
Recommended support setup for Barrage while leveling:
- Rapid Casting II
- Heightened Charges
Thunderous
Recommended support setup for Thunderous during leveling:
- Rapid Attacks III
Support Gem Progression
Tier 3 Support Gems
- Sandswept Marsh (League Mechanic) — obtain Retreat II for Twister
- The Venom Crypts (Sarcophagus) — obtain Elemental Focus for Ice-Tipped Arrows
Further support gem progression
Later in campaign/game you can aim for the next upgrades:
Retreat II for Twister
Elemental Focus for Ice-Tipped Arrows
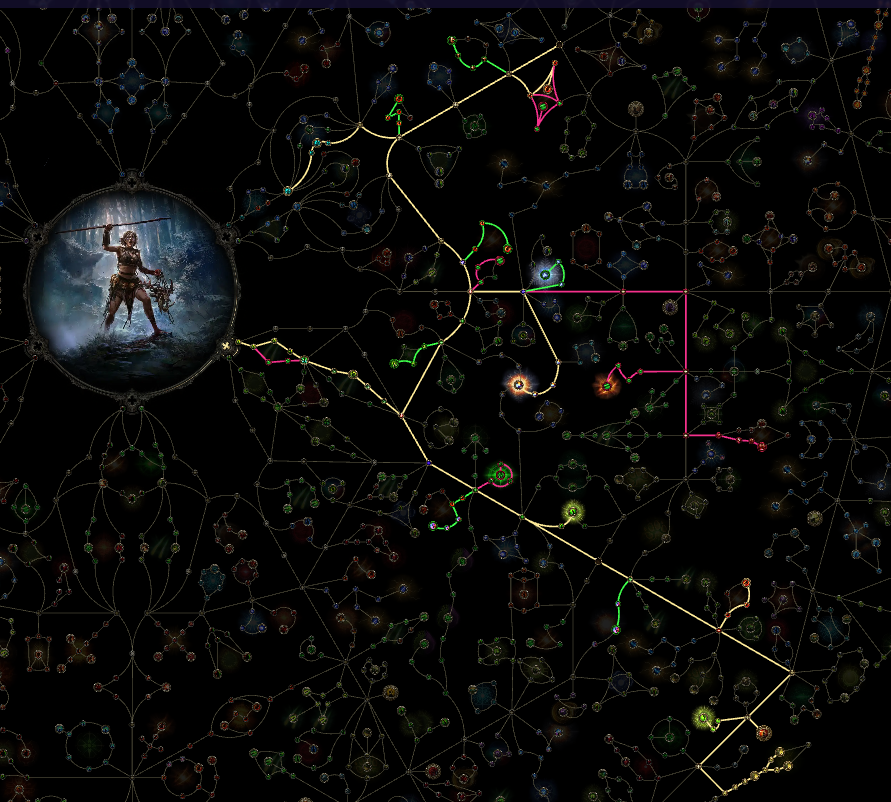
Passive Tree
Below is the recommended passive tree progression for the Twister Huntress Levelling Build, focusing on projectile damage, elemental scaling, mobility, and early survivability during the campaign.
How the Build Plays
Clearing Packs
For general map and campaign clearing, start by using Whirling Slash two or three times before casting Twister. This setup rapidly generates momentum and boosts your overall damage output.
Once you unlock Ice-Tipped Arrows, activate it before using Twister. This converts Twister’s Physical Damage into Cold Damage, allowing the skill to Freeze enemies and generate Chilled Ground through Frost Nexus.
You can also use Barrage to quickly wipe out dense monster packs while improving damage against tougher enemies.
Single Target & Bosses
Boss gameplay follows a similar rotation, but with additional buffs and utility layered in for stronger burst damage.
Use War Banner during boss fights to gain increased Attack Speed and roughly 25% more Attack Damage.
Freezing Mark further improves Freeze buildup while converting part of your damage into Cold Damage for stronger elemental scaling.
Early on, bosses should be controlled using Parry combined with Fangs of Frost to reliably create Chilled Ground.
After obtaining both Ice-Tipped Arrows and Frost Nexus linked to Twister, you can safely stop using Parry and Fangs of Frost, since Twister itself will consistently apply Freeze and Chilled Ground effects.
Passive Bonuses
Ascendancy Choices
For Ascendancy progression, prioritize Predatory Instinct if playing Amazon. Spirit Walker players should instead focus on the Owl-oriented Spiritwalker nodes for stronger projectile scaling and utility.
Campaign Passive Rewards
- Valley of the Titans — choose +1 Charm Slot and 30% increased Charge Generation (Left Path)
- Venom Crypts Vial — grants 25% increased Stun Threshold
- Abandoned Prison Chapel — grants 30% increased Life Flask Recovery
- Halls of the Dead Totems — grants +5 Strength, Dexterity, and Intelligence
- Qimah – The Seven Pillars — choose one of the following:
- 15% increased Global Defences
- +5% to all Elemental Resistances
- 12% increased Cooldown Recovery Rate

FAQ
Why isn’t Ice-Tipped Arrows working or converting Twister into Cold Damage?
Make sure Ice-Tipped Arrows is assigned to the same weapon set as Twister, which should be Weapon Set 2. If they are on different weapon sets, the conversion effect will not apply.
What do the pink and green lines on the passive tree mean?
The colors indicate weapon-set-specific passive allocations:
Pink nodes = Weapon Set 1 passives
Green nodes = Weapon Set 2 passives
Why is Whirling Slash assigned to Weapon Set 1?
In the endgame setup, the build uses Rigwald’s Ferocity, which grants bonus attack speed to Whirling Slash specifically while it is equipped in Weapon Set 1.
Why is Barrage also placed on Weapon Set 1?
This setup allows Dance with Death to affect Barrage. Since Weapon Set 2 uses a sceptre in the offhand slot, the keystone only functions properly on Weapon Set 1, granting Barrage roughly 25% more skill speed.
How does Dance with Death function in this build?
Weapon Set 1 uses no offhand item, allowing Dance with Death to activate correctly. Weapon Set 2 does not benefit because the sceptre disables the keystone interaction.
Keystones themselves cannot be assigned separately to weapon sets, which is why this interaction is handled through gear setup rather than passive allocation.
Why use Charged Mark with Freezing Mark?
Charged Mark automatically creates Shocked Ground whenever Freezing Mark activates, providing additional utility and damage amplification with minimal investment.
How does the build gain the benefit from Hail?
Ice-Tipped Arrows empowers Twister, allowing it to interact with Hail and gain the associated bonuses.
Glacial Cascade Monk Levelling Build

Build Overview
This build is focused on fast and efficient campaign progression for the Monk class.
Glacial Cascade Monk is considered one of the strongest leveling setups available for Monk, combining explosive clear speed with excellent boss damage throughout the campaign.
The build has already demonstrated extremely fast progression potential, completing the full campaign in approximately 3 hours and 48 minutes.
Strengths
- Excellent clear speed with powerful shatter explosions;
- Strong single-target damage against bosses and rares;
- Smooth campaign progression with high burst potential;
- Strong crowd control through Freeze and Cold interactions.
Weaknesses
- Fragile defenses during leveling;
- Requires careful positioning in dangerous encounters;
- Mistakes can be heavily punished against tougher enemies.
Equipment Priority
Use this regex to quickly search for useful leveling upgrades:
- Boots – Movement Speed is the top priority, followed by Resistances, Life, and Evasion.
- Rings – prioritize flat damage first, then look for Resistances and Life.
- Gloves – +Skill levels are your best option, followed by flat damage, Resistances, Life, and Evasion.
- Helmet / Body Armour – focus on defensive stats such as Resistances, Life, and Evasion.
- Amulet – +Skill levels are the strongest choice, with Life and Resistances as secondary priorities.
- Belt – use a Rawhide Belt with solid Resistances and Life whenever possible.
Skill Gems
Below is the recommended Skill Gem setup for the Glacial Cascade Monk Levelling Build, including core damage skills, support gems, and utility options used throughout the campaign.
Glacial Cascade
Recommended support setup for Glacial Cascade while leveling:
- Concentrated Area
- Cold Attunement
- Elemental Armament II
- Elemental Focus
Frozen Locus
Recommended support setup for Frozen Locus during leveling:
- Ice Bite II
- Elemental Armament II
- Freeze
Frozen Locus
Recommended support setup for Frozen Locus during leveling:
- Ice Bite II
- Elemental Armament II
- Freeze
Herald of Ice
Recommended support setup for Herald of Ice while leveling:
- Cold Attunement
- Elemental Armament II
- Magnified Area II
Frost Bomb
Recommended support setup for Frost Bomb during leveling:
- Potent Exposure
Pounce
Pounce is mainly used as a mobility and positioning tool during leveling, helping you quickly engage enemies, dodge mechanics, and maintain fast campaign progression.
Hand of Chayula
Recommended support setup for Hand of Chayula during leveling:
- Freezing Mark
- Elemental Weakness
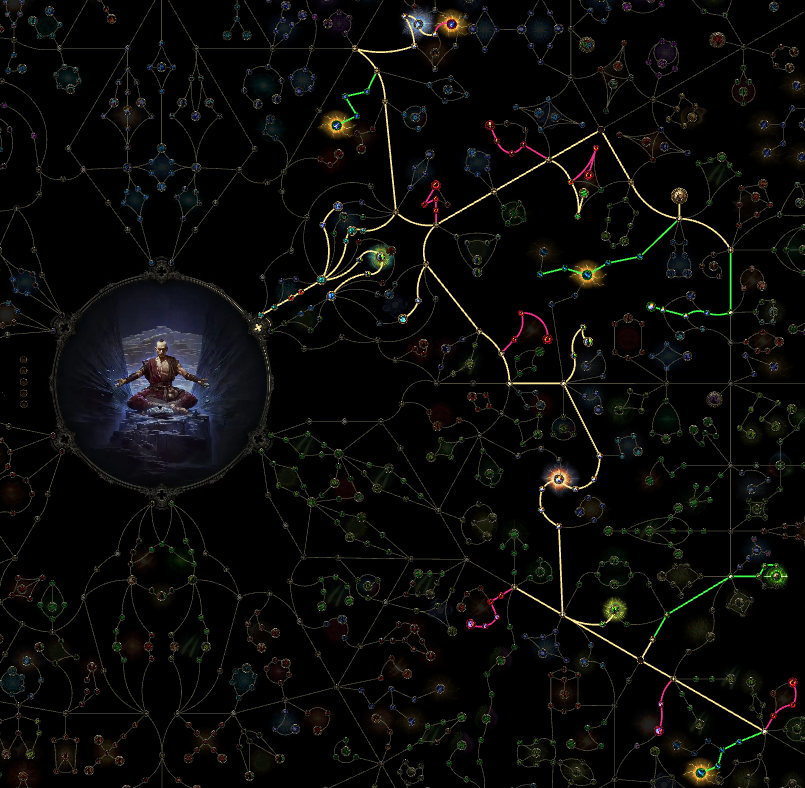
Passive Tree
Below is the recommended passive tree progression for the Glacial Cascade Monk Levelling Build, focusing on Cold Damage scaling, Freeze utility, survivability, and efficient campaign progression.
How the Build Plays
Clearing Monsters
The core leveling combo revolves around using Frozen Locus and detonating it with Glacial Cascade. This interaction becomes available extremely early and serves as the foundation of the build starting from around level 3.
Once you unlock Herald of Ice at level 10, your clear speed increases dramatically thanks to chain shatters and Cold explosion effects that quickly wipe entire packs.
Single Target & Boss Damage
Against bosses, begin by applying Freezing Mark, then use Tempest Flurry to apply Shock and amplify incoming damage.
Afterward, place Frozen Locus and detonate it with Glacial Cascade to trigger a Freeze.
Once the enemy is frozen, the build gains two major offensive buffs:
- Freezing Mark grants additional Cold damage scaling;
- Ice Bite II from Frozen Locus provides another Cold damage multiplier.
Glacial Cascade then consumes the Freeze effect to unleash an enormous burst of damage.
By the later stages of the campaign, the build stacks several massive damage multipliers simultaneously:
- Shock scaling that can approach 90% increased damage taken;
- 30% of damage gained as Cold from Freezing Mark;
- Another 30% gained as Cold from Ice Bite II;
- A huge 425% more damage multiplier when Glacial Cascade consumes Freeze.
How It Works
Ascendancy Choices
For Ascendancy progression, prioritize Mountain Teachings if playing the Martial Artistry route.
If you choose Invoker, focus on I Am the Thunder. for stronger elemental scaling and improved offensive potential throughout the campaign.

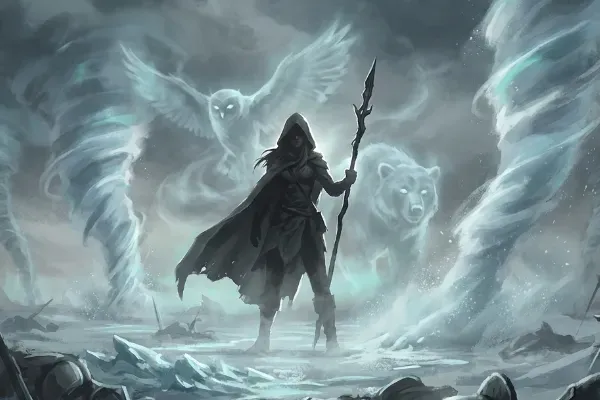
Varashta Sorceress Levelling Build

Build Overview
This build is designed for smooth and efficient campaign progression.
Varashta Sorceress is currently considered one of the strongest leveling setups for the Disciple of Varashta, combining powerful area clear with excellent single-target damage throughout the campaign.
The build has already demonstrated extremely fast progression potential, completing the full campaign in approximately 3 hours and 35 minutes.
Before unlocking Disciple of Varashta in Act 2, the build levels using a combination of Essence Drain and Ember Fusillade for smooth early-game progression.
Strengths
- Excellent clear speed against large monster packs;
- Strong single-target and boss damage;
- Efficient campaign progression with strong spell scaling;
- Smooth transition into mid-game power spikes.
Weaknesses
- Relies heavily on cooldown management;
- Can feel weaker if cooldown rotations are misused;
- Requires good positioning during dangerous encounters.
Equipment Priority
Use this regex to quickly search for useful upgrades:
- Weapon – prioritize +Level to all Minion Skills first, then Ally increased damage, followed by Ally Critical Chance or Critical Damage bonuses.
- Helmet – look for +Level to all Minion Skills, then add Resistances, Life, or Energy Shield.
- Boots – Movement Speed is the top priority, followed by Resistances, Life, and Energy Shield.
- Shield – focus on Resistances, Life, and increased Block Chance.
- Body Armour – Spirit is the main priority, with Resistances, Life, and Energy Shield as secondary defensive stats.
- Rings – use rings with strong Resistances and Life rolls.
- Gloves – prioritize Resistances, Life, and Energy Shield.
- Amulet – +Skill levels are the strongest option, followed by Life and Resistances.
- Belt – a Rawhide Belt with Resistances, Life, and Energy Shield is the best early defensive choice.
Skill Gems
Below is the recommended Skill Gem setup for the Varashta Sorceress Levelling Build, including early campaign skills, core minion setup, and support gems used after unlocking Disciple of Varashta.
Pounce
Recommended support setup for Pounce during leveling:
- Mark for Death
- Prolonged Duration II
Kelari's Deception
Recommended support setup for Kelari’s Deception during leveling:
- Bidding II
- Concentrated Area
- Magnified Area II
- Muster
Thunderstorm
Recommended support setup for Thunderstorm during leveling:
- Living Lightning
- Prolonged Duration II
- Magnified Area II
Skeletal Sniper
Recommended support setup for Skeletal Sniper during leveling:
- Last Gasp
Skeletal Arsonist
Recommended support setup for Skeletal Arsonist during leveling:
- Last Gasp
Skeletal Frost Mage
Recommended support setup for Skeletal Frost Mage during leveling:
- Last Gasp
Bind Spectre
Recommended support setup for Bind Spectre during leveling:
- Last Gasp
Skeletal Reaver
Recommended support setup for Skeletal Reaver during leveling:
- Last Gasp
Skeletal Storm Mage
Recommended support setup for Skeletal Storm Mage during leveling:
- Last Gasp
Skeletal Brute
Recommended support setup for Skeletal Brute during leveling:
- Last Gasp
Gem Notes & Progression
Important Notes
- For Kelari's Deception, switch between Magnified Area II for clearing and Concentrated Area for boss fights and single-target damage.
- Once you reach Level 36, add Muster to Kelari's Deception for a substantial damage increase.
- Do not level Thunderstorm beyond Level 5. Higher gem levels only increase attribute requirements and provide no meaningful benefit to the build.
- Every active minion grants 7% more damage to Kelari's Deception through the Muster support. Try to maintain as many different minion types as possible.
- A particularly cheap and effective Spectre option can be found in Sandswept Marsh. Capture the local wasp enemy with Bind Spectre to gain another easy source of Muster scaling.
Tier 3 Support Gems
- Sandswept Marsh (League Mechanic) — obtain Magnified Area II
- The Venom Crypts (Sarcophagus) — obtain Muster
- Follow the support gem priorities listed above for all remaining upgrades.
Tier 4 Support Gems
Isle of Kin — Beast Pen — obtain Bidding II
Passive Tree
Below is the recommended passive tree progression for the Varashta Sorceress Levelling Build, focusing on minion scaling, survivability, Spirit efficiency, and smooth campaign progression.
Prioritize nodes that increase minion damage, minion survivability, and skill levels early on, while gradually investing into defensive stats such as Life, Energy Shield, and Resistances to maintain a balanced leveling experience.

Passive Tree Progression
After obtaining Bringer of Order, begin transitioning toward the right side of the passive tree.
Prioritize key nodes such as Pure Energy and Dampening Shield, then refund the attribute nodes previously taken on the left side of the tree, as they will no longer be necessary.
Once that transition is complete, continue toward Heavy Buffer to further strengthen your defensive layers.
At this stage, you can also respec the attribute nodes located above At Your Command, replacing them with more efficient offensive and defensive investments that better support the build's late-campaign progression.
How the Build Plays
Levels 1–5
During the opening levels, apply Contagion to enemy packs and finish affected monsters with Spark to spread the effect through nearby enemies.
Against bosses, begin with Frost Bomb to apply exposure, then attack using Firebolt. If positioning allows, Spark can also be effective when enemies are trapped against walls or corners.
Levels 6–13
Once Unleash becomes available for Contagion, the clear setup becomes much smoother.
Apply Contagion, then eliminate the affected enemy with Essence Drain to trigger chain spreading through the pack.
For boss encounters, use the following rotation:
- Essence Drain
- Chaos Bolt (or your weapon skill)
- Continue casting until Essence Drain expires, usually after 2–3 casts
- Reapply Essence Drain and repeat
Levels 14+
At this stage, boss damage becomes centered around Ember Fusillade burst windows.
Recommended boss rotation:
- Frost Bomb
- Orb of Storms to generate Ember Fusillade infusions
- Cast Ember Fusillade seven times
- Use Frost Bomb again if available
- Repeat from Step 2, skipping Frost Bomb whenever it is on cooldown
Varashta Transition (Around Level 19)
After unlocking the Varashta setup, your gameplay changes significantly.
Clearing Packs
Most monster groups can be eliminated instantly with Kelari's Deception. If the skill is unavailable, use Kelari's Brutality as a backup clearing tool.
Boss Rotation
- Use Pounce to apply Mark for Death and activate the Pounce Mark bonus, which grants additional damage based on the number of active minions.
- Cast Thunderstorm to summon Living Lightning minions and further amplify the Mark bonus.
- Cast Kelari's Brutality twice.
- Cast Kelari's Deception three times.
- Repeat the rotation from Step 1.
How It Works
Ascendancy Choice
When playing Disciple of Varashta, your first priority is to unlock and build around Kelari's Deception.
This Ascendancy node serves as the core of the build's damage output, enabling powerful burst damage against bosses while also providing exceptional pack-clearing potential throughout the campaign.
Once acquired, much of your gameplay will revolve around maximizing Kelari's Deception through minion scaling, cooldown management, and the supporting buffs provided by Pounce and Thunderstorm.