~15 min
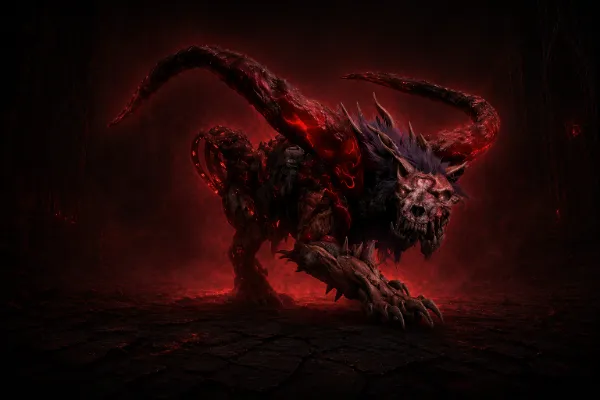
The Corrupted Reaper is the Season 14 (Season of Death Awakening) Lair Boss in Diablo 4, and the single best source of Mythic Uniques and Pandemonium Fragments in the entire game. The boss lives at the Pandemonium Threshold in Zarbinzet, Hawezar; first kill is gated behind the seasonal questline, then she becomes repeatable from a Summoning Altar. Fighting her is free, but unlocking her Hoard Cache rewards requires a Superior Lair Key per kill, farmed from the new Deathtoll Chamber mini-dungeon.
This guide covers everything for the Corrupted Reaper: the full unlock chain from Pandemonium Ruptures to the boss room, where to grind Superior Lair Keys efficiently, every ability across her three phases (including the deadliest Trap+Rush combo in Phase 3), build recommendations, the optimal Torment difficulty for drop rates, what she drops, and how many kills you should expect for each Mythic chase. The Pandemonium Fragment economy puts the average Mythic chase at 30 to 40 boss kills per specific item, a sharp improvement over the prior 100+ blind RNG path.
Corrupted Reaper At a Glance
Detail | Information |
|---|---|
Boss type | Seasonal Lair Boss (Season 14, Season of Death Awakening) |
Location | Pandemonium Threshold inside Zarbinzet, south side of Hawezar |
Difficulty requirement | Torment 1 or higher |
First-time unlock | Complete the Season 14 seasonal questline |
Repeat summon | Free interaction at the Summoning Altar (no key needed to fight) |
Hoard Cache cost (per kill) | 1 Superior Lair Key |
Superior Lair Key source | Deathtoll Chambers |
Deathtoll Chamber access | Defeat a Realmwalker (from Ruptures) or clear a Nightmare Dungeon with Rupture affix |
Phases | 3 phases (100-66%, 66-33%, below 33%) |
Immunity phases | None - damage is uninterrupted throughout |
Optimal farming Torment | Torment 12 (most balanced drop rate of fragments and Mythics) |
Primary rewards | Mythic Uniques, Pandemonium Fragments, seasonal reputation |
Average kills per specific Mythic | ~30 to 40 (via Pandemonium Fragment crafting) |
How to Unlock the Corrupted Reaper
Access is a multi-step chain that intentionally walks you through the entire Season of Death Awakening mechanic set. You cannot skip directly to the boss room.
Step 1: Reach Torment 1 Difficulty
The Corrupted Reaper requires Torment 1 or higher. Reaching Torment 1 means clearing the Pit at the appropriate tier on a character that already finished the Lord of Hatred campaign or skipped it on a seasonal alt. If you're still leveling, NextTier offers Diablo 4 power leveling services to fast-track the Torment 1 unlock.
Step 2: Complete the Seasonal Questline
Your first Corrupted Reaper encounter happens automatically inside the Season 14 seasonal questline. The questline walks you to the Pandemonium Threshold, introduces the boss in a scripted fight, and unlocks her as a repeatable Lair Boss after the first kill.
Step 3: Farm Superior Lair Keys
After the questline, summoning the Corrupted Reaper is free - just interact with the Summoning Altar. The catch is the Hoard Cache that drops after the kill: it requires one Superior Lair Key to open, and the cache is where the guaranteed Mythic and Pandemonium Fragment rewards live. Kills without a key still drop standard loot, but you skip the best rewards.
Superior Lair Keys drop from Deathtoll Chambers, a new one-room mini-dungeon. Deathtoll Chamber portals open from two sources:
- Defeat a Realmwalker spawned by a Pandemonium Rupture.
- Clear a Nightmare Dungeon with a Rupture affix - close enough Tears inside the dungeon and a Deathtoll Chamber portal opens.
The Realmwalker route is the dominant path because it ties into the same Pandemonium Rupture loop you're running for Glints of Hope and Reputation Board progression.

How to Farm Realmwalkers Efficiently
Realmwalkers are the gatekeepers of the entire Reaper economy: no Realmwalkers means no Deathtoll Chambers, which means no Superior Lair Keys, which means no Hoard Cache openings. The three Rupture variants have different Realmwalker spawn rates, and choosing the right one is the biggest efficiency lever in the chain.
Rupture Type | Where it spawns | Realmwalker Spawn |
|---|---|---|
Normal Rupture | Overworld, especially Helltides | Cannot summon a Realmwalker |
Surging Rupture | Replaces local Helltide events | Chance to spawn on Mastery completion |
Colossal Rupture | Fields of Desecration (the World Boss Arena southeast of Zarbinzet) | Guaranteed Realmwalker spawn |
The efficient farming flow:
- Run Helltides for Surging Ruptures. Keep the Rupture open as long as possible by killing monsters and closing Tears - longer Ruptures pay more. Complete the Surging Rupture's Mastery objective to roll for a Realmwalker spawn.
- Visit Fields of Desecration for Colossal Ruptures when one is available. Colossals guarantee a Realmwalker, which guarantees a Deathtoll Chamber portal, which guarantees a Superior Lair Key.
- Use Nightmare Dungeon with Rupture affix as a backup when Helltides and Colossals are between cycles. The affix gives you Deathtoll Chamber access without needing to wait for a Realmwalker spawn.
Stockpile Superior Lair Keys before sitting down to grind the Reaper. Running back to chase a Realmwalker between every Hoard opening wastes minutes that add up across a session.
Corrupted Reaper Boss Fight Mechanics
The fight is divided into three phases that escalate as her health drops. There are no immunity phases: you can apply damage uninterrupted from start to finish, which heavily favors burst and AoE builds. The arena is circular, and most of your survival depends on positioning relative to traps and dash paths.
The Three Phases
Phase | Health Range | What Changes |
|---|---|---|
Phase 1 | 100% to 66% | Baseline abilities - manageable on most builds |
Phase 2 | 66% to 33% | Faster dashes, wider projectile spreads, more traps on the floor |
Phase 3 | Below 33% | Trap+Rush combo unlocks - the only mechanic that consistently kills geared characters |
Every Ability the Corrupted Reaper Uses
Soul Projectiles
The Reaper fires slow-moving projectiles in a straight line. In Phase 1 she fires four projectiles - low damage, you can tank them or sidestep casually. In Phase 2 the count goes up to six and the spread fans outward. In Phase 3 she drops the ability entirely, replacing it with the more dangerous Trap+Rush combo. Strategy: move laterally to avoid them, never burn defensive cooldowns on this attack.
Teleport to Center
The Reaper crouches, then teleports to the middle of the arena dealing AoE damage on impact. The crouch is the only telegraph you get. Strategy: when you see the crouch animation, move away from center immediately. The impact AoE is large enough to chunk a geared character's health. Position near the edges of the circular arena by default so you do not have to scramble far.
Soul Traps
The Reaper spawns three Soul Traps at random positions around the room - circular floor markers that arm after a brief delay. Standing inside an armed trap for about three seconds detonates it. The Reaper can also detonate traps by passing through them with her Soul Rush dash. Strategy:
- Watch the arm animation. As soon as a trap arms, leave the circle.
- You can manually trigger a trap by stepping in and out quickly to clear it from the arena on your terms, preventing it from being chained later.
- Stagger the boss to clear all active traps at once.
- Never let traps accumulate. A cluttered arena combined with the dash becomes a death sentence in Phase 3.
Soul Rush (Dash)
The Reaper dashes in a straight line through the arena, dealing damage to anything in her path. In Phase 1, it's a single dash - simply step out of the path. In Phase 2, the dash becomes significantly faster and she dashes back and forth between two locations in rapid succession. Strategy: do not move back into the path immediately after the first dash in Phase 2 - anticipate the return. Pay extra attention to any traps near her dash path; the dash will detonate them, creating chain explosions.
Trap+Rush Combo (Phase 3 Only)
The deadliest ability in the fight. Once the Reaper drops below 33% health, she gains a combination attack: she casts a line of Soul Traps across the floor, then immediately follows up with a Soul Rush through the trap line, detonating all of them in a single chain. The simultaneous detonations create overlapping explosions that can instantly kill even high-Torment geared characters. Strategy:
- When you see a line of traps spawn, move to the edges of the arena and position perpendicular to her charge direction.
- Do not attempt to tank the chain. Movement is your only defense.
- Save your unstoppable abilities, invulnerability cooldowns, or major movement skills for this moment.
- Apply burst damage during the recovery between Trap+Rush windows - the boss is briefly stationary.
Phase-by-Phase Strategy
Phase 1: Set the Tempo (100% to 66%)
The easiest phase. Use it to establish your positioning habits for the rest of the fight. Stay near the edge of the arena, sidestep the four-projectile barrage, manage the first wave of three Soul Traps, and move out of Soul Rush dash paths. Apply consistent damage; you should be deep into Phase 1 within a minute on a properly geared character.
Phase 2: Manage the Clutter (66% to 33%)
The arena starts getting busy. The projectile spread is wider, the dash is faster and doubles back, and traps stack up more quickly. Manually trigger traps when possible to keep the arena clean. Save heavy cooldowns - you'll want them in Phase 3.
Phase 3: Survive the Combo (Below 33%)
The Trap+Rush combo replaces the Soul Projectile ability and becomes the primary threat. Watch for the line-of-traps animation and immediately reposition perpendicular to her charge direction. If the arena is already cluttered with leftover traps from Phase 2, stagger the boss to clear them at the start of Phase 3. Burst damage during the brief recovery windows finishes the fight.
Best Builds for the Corrupted Reaper
The fight rewards specific build characteristics more than raw damage. No immunity phases means damage throughput converts directly to boss kills per hour, so any build that can sustain damage through positioning can farm her. The four archetypes that excel:
- Mobile builds. Movement speed, teleport skills, and unstoppable effects easily dodge every mechanic, including the Trap+Rush combo. Top-tier farming setup if you have it.
- Stagger-heavy builds. Clearing the arena of traps via stagger removes the deadliest environmental threat and creates damage windows. The most consistent low-deaths approach.
- Ranged builds. Safer positioning lets you see mechanics develop from a distance. Less likely to get caught in trap cluster explosions.
- Tanky builds. Can eat individual trap detonations and dash paths, but cannot survive the Phase 3 Trap+Rush combo without movement. Don't rely on tankiness alone.
Specific Season 14 builds that excel: Whirlwind Barbarian (Tower 140 PTR clear), Shred Lightning Druid (Tower 135), and Counterswarm Spiritborn (carries on two Mythic Uniques) all handle the Reaper reliably at Torment 12. If your build still lacks the Paragon levels needed for the higher Torment tiers, NextTier offers D4 Paragon leveling to close the gap.
Rewards: Mythic Uniques and Pandemonium Fragments
Blizzard explicitly stated the Corrupted Reaper is the best loot source in Season of Death Awakening - higher Mythic drop rates than any other activity in the game.
Mythic Uniques
The Reaper has the highest direct Mythic Unique drop rate in the game. In Season 14, every Unique can potentially drop as a Mythic variant after the Mythic Unique 3.0 rework. Mythic Uniques from the Reaper roll with maximum affix values and a 30% bonus to Unique Powers.
Critical for Mythic chasers: there's no limit on dropped Mythics. The one-Mythic limit applies only to crafted Mythics in the Horadric Cube. Every Reaper-dropped Mythic can be equipped freely alongside crafted Mythics.
Pandemonium Fragments
The Reaper is the most reliable source of Pandemonium Fragments, the Season 14 currency used to upgrade regular Uniques to Mythic quality in the Horadric Cube. The recipe: 5 Pandemonium Fragments plus one 850+ Item Power Unique creates a Mythic of the same slot. The output Unique within that slot is random.
The fragment economy puts a soft ceiling on Mythic farming. With consistent Reaper farming, expect 30 to 40 Hoard Cache openings per specific Mythic Unique you want, factoring in fragment drops, crafted-item RNG, and direct-drop chances. The old random-drop model could take 100+ kills with no target guarantee. The Reaper's structured fragment economy is a real efficiency upgrade.

Other Reaper Drops
- Season 14 reputation progression via the Reputation Board in Zarbinzet (also fed by Glints of Hope from Ruptures).
- High-tier Ancestral Unique items at Mythic-track quality.
- Crafting materials for the Horadric Cube and other endgame recipes.
- Pandemonium Chests can occasionally drop during combat for extra rewards.
Recommended Difficulty: Torment 12
The Reaper unlocks at Torment 1, but drop rates scale with difficulty. Torment 12 is widely cited as the optimal balance of Pandemonium Fragment drop quantity and Mythic Unique quality. Higher Torment tiers offer better individual loot but slower kill times that often net less per hour.
The decision tree:
- Just starting Season 14? Farm at the highest Torment you can clear comfortably in under 2-3 minutes per kill. Killing more bosses per hour outweighs marginal per-kill drop quality at lower tiers.
- Have a solid 4-piece + Mythic chase build? Push to Torment 12. The balanced drop rates are why the community settled on this tier as the farming sweet spot.
- Pushing the Tower Leaderboard? Use even higher Torments for the loot quality, but accept slower per-hour throughput.
Common Mistakes That Get Players Killed
- Standing on the edge of red danger zones. The boss uses delayed explosions that fully cover the area after a brief telegraph. Edge-tanking these can chain into instant death even on well-geared characters.
- Tanking the Trap+Rush combo in Phase 3. Overlapping trap detonations exceed virtually any build's effective HP. Movement is the only defense - tank attempts kill geared characters as reliably as Phase 1 stops being a threat.
- Letting traps accumulate. A cluttered Phase 2 arena becomes lethal in Phase 3 when the Reaper starts chaining detonations with her dash. Manually trigger or stagger-clear traps before they pile up.
- Burning defensive cooldowns in Phase 1. You will need invulnerability and unstoppable effects for the Trap+Rush combo. Phase 1's projectiles are tankable - save the cooldowns for Phase 3.
- Standing too close to nearby traps during dashes. The Soul Rush detonates traps it passes through. Position with awareness of both the dash path and any nearby armed traps.
- Forgetting Superior Lair Keys before pulling. Killing the Reaper without a Superior Lair Key means skipping the Hoard Cache's guaranteed Mythic and Pandemonium Fragment rewards. Standard loot still drops, but the trip is essentially wasted.
Quick Reference Death Prevention Checklist
- Move away from center when the Reaper crouches (Teleport telegraph).
- Run out of trap circles the moment they arm.
- Stay out of every Soul Rush dash path.
- In Phase 3, immediately move to the arena edges when a line of traps spawns.
- Save unstoppable, invulnerability, and movement cooldowns for the Trap+Rush combo.
- Stagger the boss whenever the arena gets cluttered with traps.
- Stockpile Superior Lair Keys before sitting down to farm.
Save -20% on your boost ⚡

Corrupted Reaper FAQ
Where is the Corrupted Reaper in Diablo 4?
At the Pandemonium Threshold in Zarbinzet, in the south side of the Hawezar region. Your first encounter is automatic during the Season 14 seasonal questline; after that, interact with the Summoning Altar at the same location to re-summon her.
What do I need to fight the Corrupted Reaper?
Three requirements. Torment 1 or higher difficulty, completion of the Season 14 seasonal questline for the first kill, and a Superior Lair Key per Hoard Cache opening. Summoning the boss itself is free.
What's the difference between Superior Lair Keys and Betrayer's Husks?
They're separate keys for separate bosses. Superior Lair Keys unlock the Corrupted Reaper's Hoard Cache - she's the only boss in Season 14 using them. Betrayer's Husks are still used by Belial (the Exalted Lair Boss) and are obtained differently. Some early PTR coverage confused the two; the final Season 14 implementation uses Superior Lair Keys exclusively for the Reaper.
Where do Superior Lair Keys drop?
From Deathtoll Chambers, the one-room mini-dungeon introduced in Season 14. Deathtoll Chamber portals open after defeating a Realmwalker (spawned by Pandemonium Ruptures) or by clearing a Nightmare Dungeon with the Rupture affix.
What's the fastest way to farm Realmwalkers?
Colossal Ruptures in the Fields of Desecration guarantee a Realmwalker spawn. Surging Ruptures inside Helltides have a chance to spawn one on Mastery completion. Normal Ruptures in the overworld cannot summon Realmwalkers. Run Helltides for steady Surging Rupture chances and visit the Fields of Desecration for guaranteed Colossal spawns.
What is the best difficulty to farm the Corrupted Reaper?
Torment 12 is widely cited as the optimal balance of Pandemonium Fragment drop quantity and Mythic Unique quality. Higher Torments produce slightly better individual loot but slow your kills-per-hour, which usually loses ground overall.
How many Pandemonium Fragments do I need to craft a Mythic?
Five Pandemonium Fragments and one 850+ Item Power Unique item in the Horadric Cube. The output Mythic is in the same slot as the input Unique but is otherwise random within that slot's Mythic pool.
How many Reaper kills should I expect per Mythic chase?
Approximately 30 to 40 Hoard Cache openings per specific Mythic Unique you're chasing. That accounts for both direct Mythic drops and Pandemonium Fragment accumulation for targeted Horadric Cube crafts. The old pre-Season 14 RNG model could take 100+ blind boss kills without a path to a specific item, so the new structured economy is a meaningful improvement.
Can I farm the Corrupted Reaper if I'm not in the seasonal Realm?
No. The Corrupted Reaper is a seasonal Lair Boss exclusive to Season 14 characters in the Season of Death Awakening Realm. Eternal Realm characters cannot access her. Once Season 14 ends, the boss leaves Sanctuary along with the seasonal content.
Does the Reaper have immunity phases?
No. Unlike most endgame bosses in Diablo 4, the Corrupted Reaper takes uninterrupted damage from start to finish. There are no forced phase breaks, no invulnerability windows, and no scripted intermissions. Burst and AoE builds are exceptionally strong here because there's no wasted damage uptime.
What's the deadliest mechanic in the fight?
The Trap+Rush combo, which only appears in Phase 3 (below 33% health). She drops a line of Soul Traps and immediately dashes through them, detonating all of them in an overlapping chain. The explosions can instantly kill even high-Torment geared characters. Reposition to the arena edges perpendicular to her charge direction when you see the trap line appear.
Can I cheese the boss with one specific build?
No reliable cheese has emerged from PTR testing. The Reaper's no-immunity design rewards every build that can sustain damage, but the Trap+Rush combo and the no-tank rule of Phase 3 means all builds need to honor the mechanics. Mobile builds, stagger builds, and ranged builds are the three archetypes that consistently farm her at Torment 12.
Where is the Reputation Board in Zarbinzet?
In Zarbinzet itself, alongside the Pandemonium Threshold. Redeem your Glints of Hope (earned from Pandemonium Ruptures) at the board to unlock seasonal progression rewards including additional Pandemonium Fragments. The board feeds the same Mythic chase as the Reaper's Hoard Cache, so it stacks directly with boss farming.
Are there any Reaper-specific cosmetic rewards?
The Season Journey for Season of Death Awakening includes a Remains of the Reaper mount trophy as a high-rank reward. Other cosmetics tied to seasonal progression (titles, the Greystone pet, and others) feed off the same seasonal questline that introduces the Reaper.